November 2023
Updates on the
Truora Platform

Launch and manage your message campaigns with ease through Truora
What do I need to send a campaign?
1. Create an outbound message and have it approved by Meta.
2. Have an Excel file with two main columns: One containing the area code of the users to whom the campaign will be sent (e.g., +57), and another column with the phone numbers of the users (e.g., 31541829465).
If variables were created within the outbound message, they should also be included in the file as additional columns, one for each variable (e.g., name, date)."
How do I send my campaign?
- Go to the 'Campaigns' tab.
- Click on the upper right button + New Campaign.
- Name the campaign.
- Select the previously created outbound message. Click continue. *If it's an outbound with a flow, select the corresponding flow.
- Upload the previously created database in Excel and select the variable fields to match: the area code, phone number, and variables.
- Schedule the delivery or send immediately.
- Download the results in 'Options' (the three dots next to the status).
How can I schedule my campaigns for another time?
In the option to schedule delivery, select the exact date and time you want the messages to be sent. Remember that you can change the time zone.
Once the day and time of delivery are configured, the messages will be sent automatically.
How to measure the impact of my campaign?
After the sending is completed, you'll be able to access detailed information about the performance of your campaign.
You can see the number of messages sent, the total reach of users reached, and those who interacted with the message (if it's a flow).
You can download all user responses by clicking on the three 'Options' buttons on the right side of the campaign.
These results will allow you to measure the success of your campaigns and conduct analysis to improve your strategies in the future.
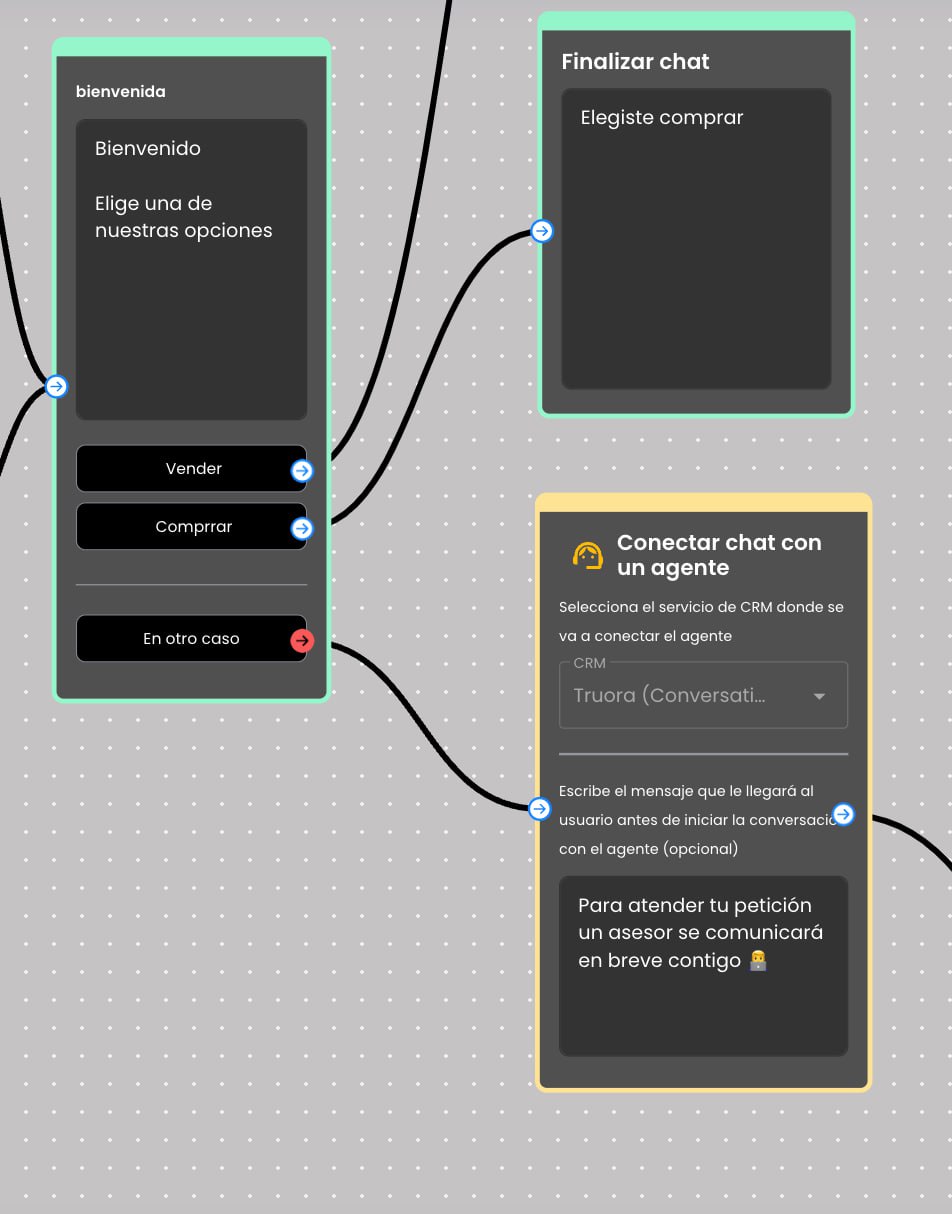
Activate the 'In other case' button to interact with users who do not follow the flow.
It´s common for users to respond incorrectly in the flow, especially in button options. Now, we've added the 'In other case' option to redirect the conversation to a different block and avoid misunderstandings! Previously, conversations were marked as failed if users didn't follow the flow. Now, you can redirect them and keep the conversation active. Just enable the 'In other case' option and build a specific flow for these users who need a different path.

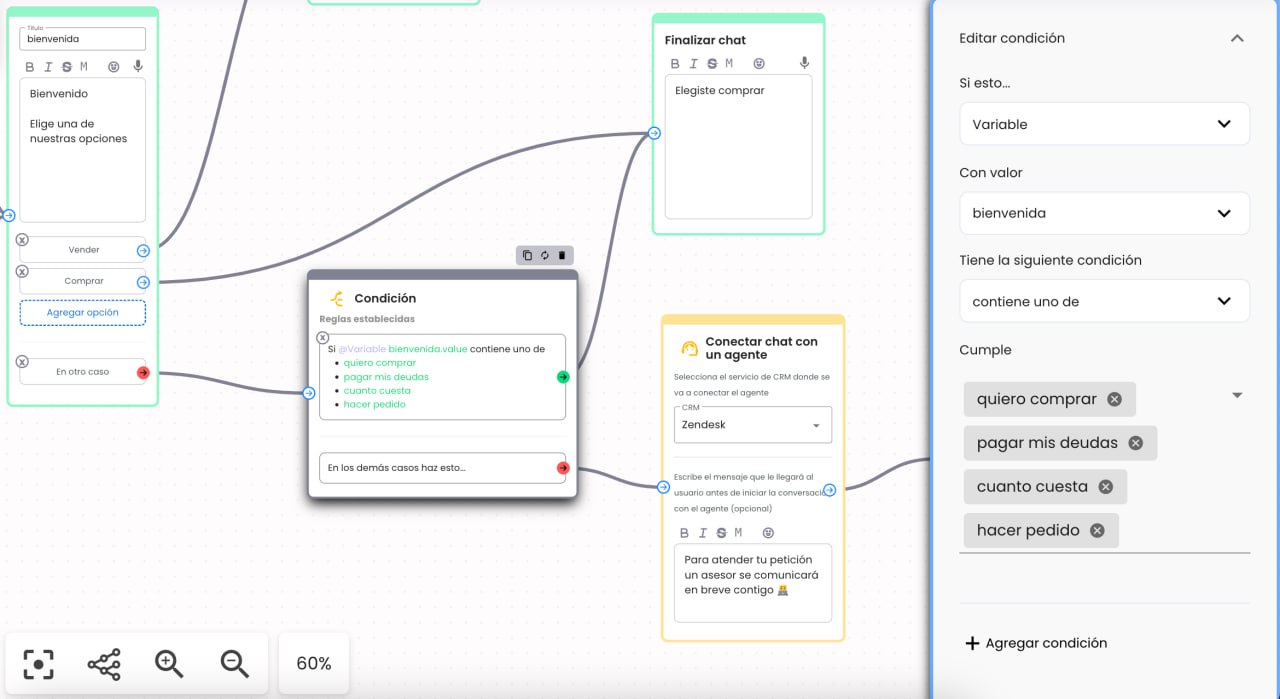
Customize interactions with your users through conditionals
We introduce the option of conditionals to guide users, based on their responses, to different branches of a conversational flow. You can configure conditions based on keywords to direct users to the correct block.

Import your contact list to Truora
Now you can import your contacts in bulk through an Excel file (.xlsx). Imagine the convenience of managing thousands of contacts at once.
-
Duplicate contacts: If a contact already exists with the same number, it is not overwritten; we simply move on to the next row in the file. The results report will provide instant feedback on these cases.
-
Custom properties: They are optional, but if you decide to use them, make sure to assign a value to each property in each row! The report will also highlight incorrect rows due to missing values in the properties.
- Mandatory format: Import is mandatory with phone number and name. Whether through inbound or import, all contacts will be displayed in conversations. However, if a contact already exists due to an inbound entry, the import of that row will fail to avoid duplicates.
Important: Excel File Format (.xlsx)
- Column 1: Contact numbers
- Column 2: Contact names
- Additional columns (optional): Custom properties
Following this format will ensure a smooth import, and you will make the most of these new features.

%2011.24.11%20a.%20m..png)
%2011.25.39%20a.%20m..png)
%207.12.47%20p.%20m..png)